A Quick Guide to Metering for Portrait Photography: Which to Use and When.
Metering is a fundamental concept in photography that helps control exposure, ensuring your images appear as intended, regardless of lighting conditions. If you’ve ever been frustrated by an image that turned out too bright or too dark, metering is the tool to help you achieve your desired results. Here’s an easy-to-follow guide on metering for Portrait photography, including when and how to use different modes.
What is Metering in Photography?
Metering refers to the way a camera measures the brightness of a subject. Modern digital cameras come equipped with a built-in light meter that calculates how much light is hitting your subject. In manual shooting mode, this meter helps photographers adjust their settings to achieve the ideal exposure.
The meter evaluates the light in your frame and guides you in determining whether to adjust aperture, shutter speed, or ISO for the desired brightness. This makes metering essential, especially in controlled environments like Portrait photography, where proper exposure ensures your subjects look appetizing and vibrant.
Why Use Metering?
Cameras don’t measure brightness across the entire frame uniformly. Instead, they assess specific areas based on the metering mode you select. This means you can prioritize particular parts of the frame for accurate exposure.
By choosing the appropriate metering mode, you control where the camera evaluates brightness, enabling you to capture your subject perfectly lit. The right metering mode can make a huge difference, particularly in Portrait photography, where lighting plays a crucial role. Why Focal Length Matters in portrait Photography and How It Can Improve Your Shots
Types of Metering Modes
While metering options vary by camera brand and model, the most common modes include:
- Matrix Metering (Nikon) or Evaluative Metering (Canon)
- Centre-Weighted Metering
- Spot Metering
Let’s explore each in detail.
1. Matrix Metering or Evaluative Metering
Matrix or Evaluative Metering divides the frame into multiple sections, analyzing each region for light and dark tones. It then prioritizes the area where you’ve focused. This mode ensures balanced exposure across the frame and is typically the default setting in most DSLR cameras.
- Best For: General Portrait photography, especially still-life setups where balanced exposure is desired.
- Why Use It: It’s reliable and beginner-friendly, offering well-exposed shots in most situations.
2. Centre-Weighted Metering
This mode focuses on the center of the frame and evaluates the surrounding areas for brightness. It disregards the subject you’ve focused on and instead assumes the central area is the most important.
- Best For: Scenes where your main subject is positioned centrally, like a plate of Portrait or a drink in the middle of the frame.
- Why Use It: Ideal for situations where the rest of the frame’s exposure isn’t as critical, such as when shooting outdoors or with bright backlighting.
3. Spot Metering

Spot Metering evaluates the brightness of a specific, small area around your focus point. This mode is highly precise and ignores the rest of the frame.
- Best For: Subjects that are small or off-center, or when you want to ensure your main subject is perfectly exposed, even if other parts of the image are overexposed.
- Why Use It: Useful in challenging lighting conditions, such as shooting small Portrait items or intricate details.
Which Metering Mode is Best for Portrait Photography?
In Portrait photography, the metering mode you choose largely depends on the setting and subject:
- Matrix/Evaluative Metering:
- The go-to mode for most Portrait photography setups.
- Balances light and dark tones, ensuring your entire frame looks well-exposed.
- Ideal for indoor shots with controlled lighting.
- Centre-Weighted Metering:
- Best for bright, outdoor shots where your subject is centrally located, such as brunch on a sunny patio.
- Prioritizes exposure for the subject while allowing the background to be overexposed if necessary.
- Spot Metering:
- Perfect for highlighting small subjects or details in the frame.
- Useful when shooting intricate Portrait compositions or when the lighting is uneven.
How to Change Metering Modes on Your Camera
Every camera brand and model has different methods for switching metering modes. To find the options:
- Check your camera manual or perform a quick online search for your model.
- Look for the metering mode symbols, typically displayed in the main settings menu or viewfinder.
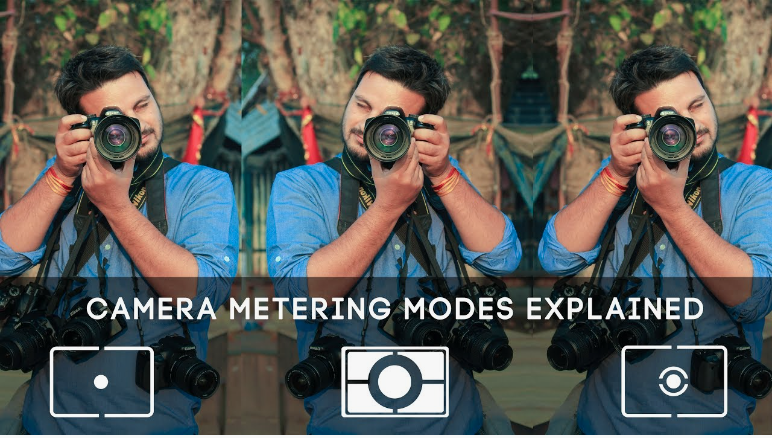
- Familiarize yourself with the symbols for each mode:
- Matrix/Evaluative Metering: A rectangle with multiple dots inside.
- Centre-Weighted Metering: A circle within a larger rectangle.
- Spot Metering: A single dot or small circle.
Practical Tips for Using Metering Modes
- Start with Matrix/Evaluative Metering for still-life Portrait photography. This mode handles most lighting situations effectively.
- Use Centre-Weighted Metering for outdoor or backlit scenes to prioritize exposure on your main subject.
- Switch to Spot Metering for small or intricate subjects when precision is crucial.
The Recap – Metering for Portrait Photography
Metering might seem technical at first, but it’s an invaluable tool for achieving perfect exposure in Portrait photography. Here’s a quick summary:
- Metering Basics: Helps control exposure by evaluating light in specific parts of the frame.
- Modes to Know:
- Matrix/Evaluative: Balances light across the frame, great for general use.
- Centre-Weighted: Focuses on the center, ideal for bright outdoor settings.
- Spot: Measures light on a small, specific area, perfect for intricate shots.
- Portrait Photography Best Practices: Start with Matrix/Evaluative Metering, then adapt based on your subject and setting.
Lesson Activity
- Grab your camera and locate the metering mode settings using the manual.
- Practice switching between the modes, starting with Matrix/Evaluative Metering.
- Experiment with different scenarios, like outdoor brunch or small details, to see how each mode affects your exposure.
By mastering metering, you’ll elevate your Portrait photography, creating images that are not only well-lit but also visually captivating! 2 Types of Distortion That Can Affect Your Portrait Photos
